Introduction
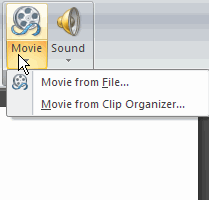 You may want to insert a movie into your PowerPoint presentation. You can insert a movie from a file on your computer or from the Microsoft Office clip organizer. In addition, PowerPoint gives you many options to define how the movie will operate in the presentation.
In this lesson, you will learn how to insert two types of movies and define the movie options.
Inserting a movie from a computer file
Download the example to work along with the video.
To insert a movie from a file on your computer:
- Select the slide where you want to insert the movie.
- Select the Insert tab.
- Click the drop-down arrow on the Movie command in the Media Clips group.

- Select Insert a Movie from File from the menu. The Insert Movie dialog box will appear.
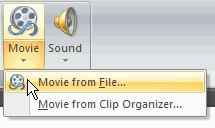
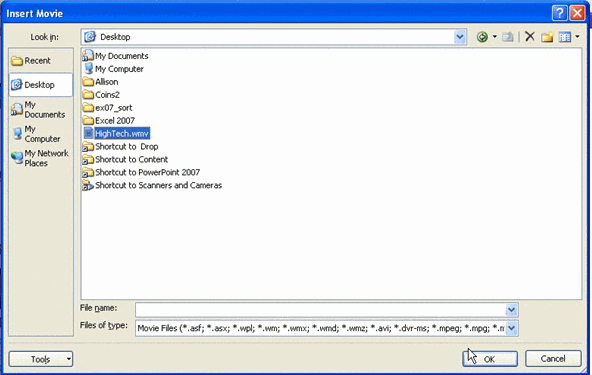
- Locate the file you want to insert from your computer.
- Click the file name.
- Click OK. The movie will appear on the slide. The Movie Tools Options tab and Picture Tools Format tab appear on the Ribbon when the movie is inserted.
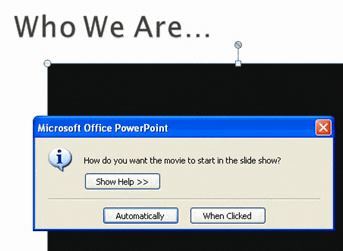
- A dialog box will appear. Click Automatically or When Clicked. Automatically will start the movie automatically as soon as the slide appears in Slide Show view, while When Clicked will start the movie when you click.
Sizing handles are located around the movie. Click, drag, and release the resizing handles to resize the movie. The sizing handles work the same here as with pictures, text boxes, and shapes.
If a slide layout has a content placeholder, click the Insert Media Clip command to insert a movie located on your computer.
Working with movies
To preview the movie:
- Select the movie on the slide.
- Select the Options tab.
- Click the Preview command in the Play group.

- Press the Preview command again to stop the movie before it finishes playing.
To change the movie volume:
- Select the movie on the slide.
- Select the Options tab.
- Click the Slide Show Volume command in the Movie Options group.
- Select low, medium, high, or mute to change the movie volume.
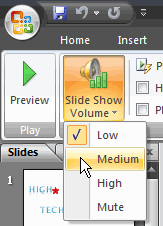
To change when the movie starts:
- Select the movie on the slide.
- Select the Options tab.
- Select the drop-down menu next to Play Movie: in the Movie Options group to change whether the movie plays Automatically or When Clicked.

Other options
Click a box to select and deselect movie options on the Movie Tools Options tab. These options include:
- Hide During Show
- Play Full Screen
- Loop Until Stopped
- Rewind Movie After Playing

Picture Tools Format tab
Many of the commands on the Format tab cannot be used to modify the video in a significant way; however, a picture style can be applied to the movie.

Inserting movie clips
To insert a movie from the clip organizer:
- Select the slide where you want to insert a movie clip.
- Select the Insert tab.
- Click the Movie command in the Media Clips group.

- Select Movie from Clip Organizer from the menu. The Clip Art task pane will appear on the right.
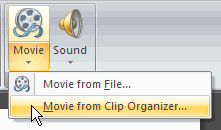
- Enter keywords in the search field.
- Click Go. Movie clips that meet the keyword search will appear in the task pane.
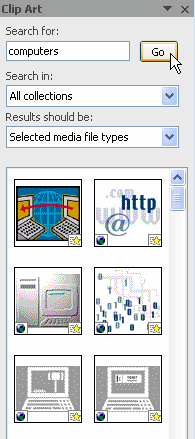
- Click a clip to insert it. The clip will appear on the slide.
Movies in the clip organizer are similar to animated picture files. You can select Office Online at the bottom of the Clip Art task pane to view additional movie clips.
To delete a media clip:
- Select the movie from your computer or the clip organizer.
- Click the Delete key.
Challenge!
Use the Company Overview presentation or any other presentation you choose to complete this challenge.
- Open a presentation.
- Insert a movie from a file on your computer, if you have one.
- Preview the movie.
- Change the slide show volume.
- Insert a movie from the clip organizer.
- Delete one of the movies.

0 Comments:
Đăng nhận xét